

Slathered in Milk
Yes, this is another one of those monstrously long posts . . .
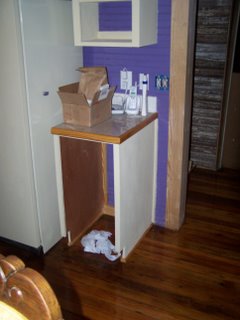
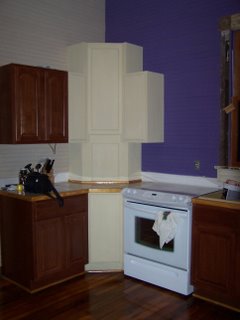
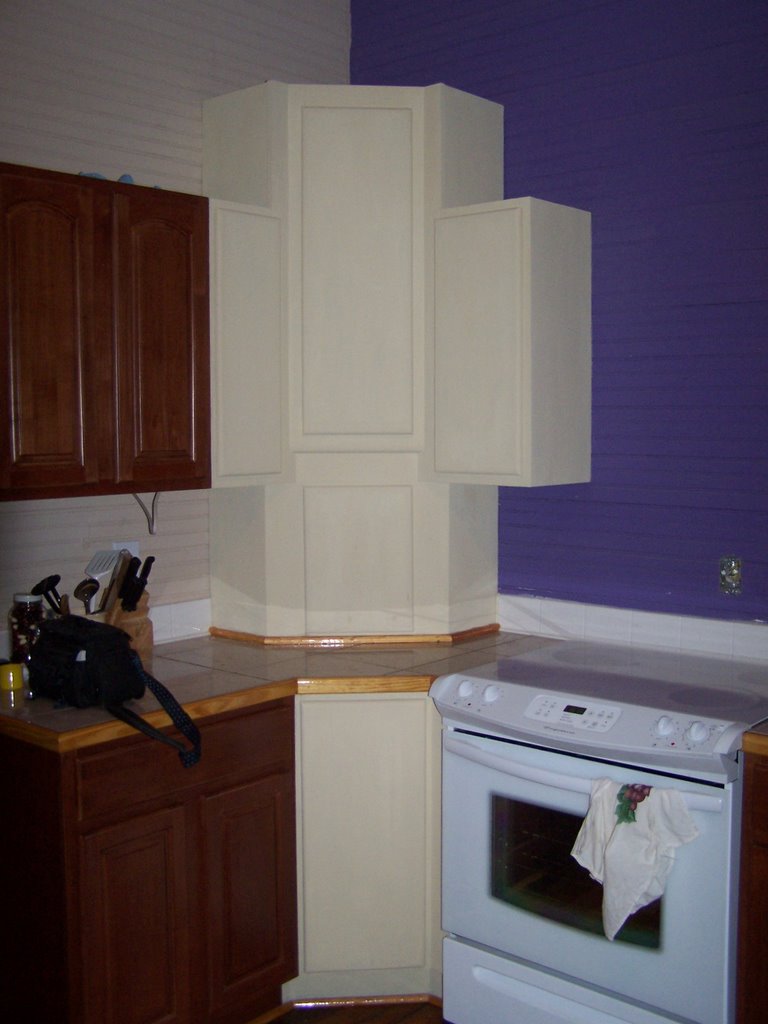
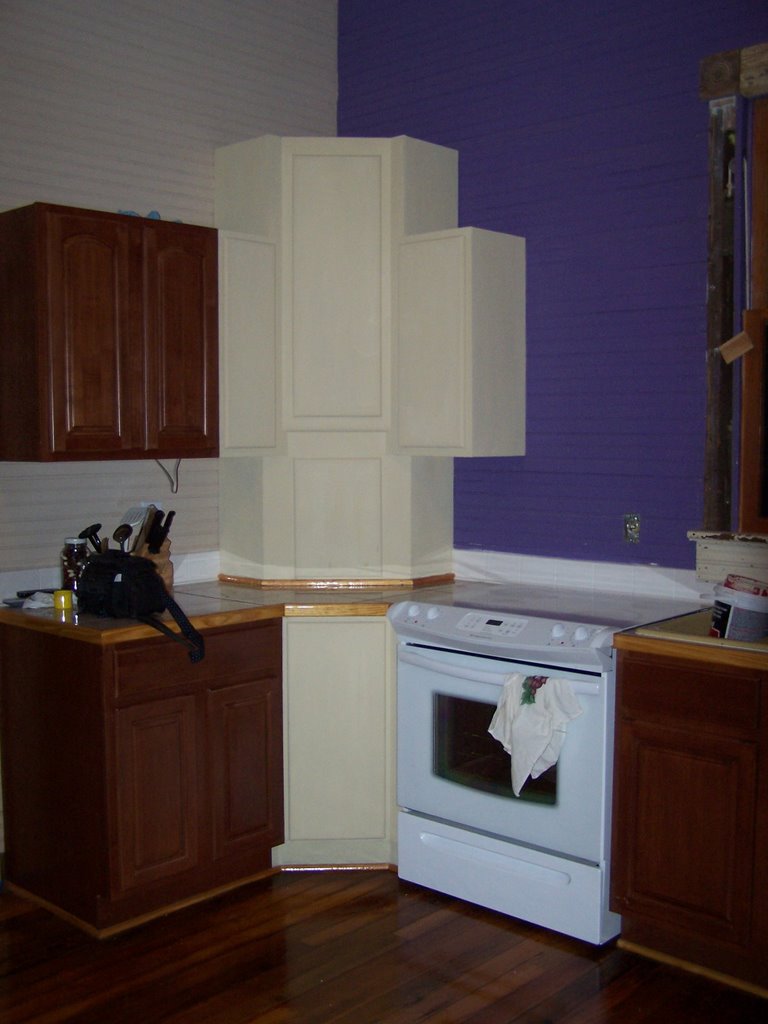
Over the weekend, my wife and mother-in-law painted our custom kitchen cabinets. We used milk paint we ordered from The Old Fashioned Milk Paint Co., Inc. I’ve been pleased with them so far. I ordered online, the paint arrived in about a week, and is just as they described it.
Milk paint is an entirely different animal than oil or latex based paint. It differs from oil & latex paints in several ways:
1) It is powder. You pour the powder into a bucket (we used an old coffee can and an empty joint compound bucket) and mix it one part powder to one part warm water. Then, you stir like crazy. The Old Fashion Milk Paint Co. recommends that you use a standard paint mixer (drill attachment or the like) for larger batches. Since I was making a small batch (a bit over a pint), I used a plastic fork. Very professional, I know. Basically, stir until you get all the lumps out. The use of warm water helps the powder dissolve quickly and makes for a smooth, non-lumpy paint.
2) If stored correctly, the milk paint powder can last for a very long time (years?), but, once you mix it, you are committed. You have to use it immediately or else it will spoil. According to the instructions, if you seal it well enough (and refrigerate? I forget), it can last up to 48 hours.
3) If you’re applying it to bare wood, you don’t have to prime it. The milk paint bonds well to the wood.
4) It goes on unevenly. The first coat or two are scary even if you know that this is how it is supposed to look. However, once you get several layers on, it gives you an interesting finish, an extra sense of depth & texture.
5) If you’re applying milk paint on something that will be exposed to water or cooking grease, you need to seal the milk paint. Otherwise, it will be ruined. Since we haven’t sealed ours yet, I don’t have too many tips on that yet. I’ll post more once we get around to it.
I made the first batch after breakfast thinking that they’d start painting within 30-40 minutes. As it turned out, they didn’t get to it for a few hours. The coffee can lid didn’t do too great of a job in sealing, and the paint had already begun to set by the time they were ready to begin. What had been a creamy liquid was now thick like pancake batter. Fortunately, adding some additional water thinned it back down enough to paint with it.
Even so, after a couple of hours, it was starting to get “boogery.” Additional water didn’t take out the snotty clumps, so we mixed up a fresh batch. This batch came out pretty good except that it was a little too watery, but it was still serviceable. That’s what I get for eyeballing my measurements I guess.
My mother-in-law wasn’t impressed with the milk paint at first. She looked at the bucket of paint and said, “are you sure you want to use this?” After the second streaky coat, she still hadn’t been won over, but, by the end of the day, she’s decided that it looked really good.
We originally planned to use this buttermilk (this is the color of this milk paint) as the base coat. However, once they got the cabinets painted, we decided that we really like this color as it is. So, we won’t be going over it with a top coat of purple and wiping & sanding it off to give it an old, worn finish. Buttermilk makes us happy for now.
And, speaking of a change in plans, my wife painted the refrigerator. She decided that she liked the wood paneled Petch House refrigerator, but the temptation was too great to resist. She scrubbed the front doors of the fridge down with a strong cleaner (I had to leave, it made my nose run) and painted the doors with milk paint. I had no objection to this though I am wondering how long it’ll stick. So far (three days and counting), it is holding really well.
My wife and mother-in-law had a few thoughts about the milk paint once they were finished. Foremost, neither of them would want to paint an entire room with this stuff. It took them around six hours to paint all the cabinets. My wife estimated they put on around 10 coats of the stuff. I suspect that 10 coats were necessary because the second batch of paint was a bit too thin. My guess is that they could have had the same finish with about 6 or 7 coats if I’d done a better job of it.
The finish isn’t smooth like most paints. Even if it looks flat & smooth (no obvious bumps, boogers, et cetera), it feels course to the touch. As you use the cabinets (or furniture as the case may be), the paint is supposed to buff up to a nice satin finish. It doesn’t chip or flake off but evolves instead. It should be interesting to see how it turns out over time.
One other note, if you happen to get any sort of grease, oil, or similar substance on your unfinished wood before you paint, you may want to prime it. Apparently, there were a few spots where something got on one of the cabinet doors and it’s bled through the paint already. It’s not too bad, so we’re just going to let it be. However, if you’re looking for a perfect finish, you may want to keep this in mind.
And, some pictures:

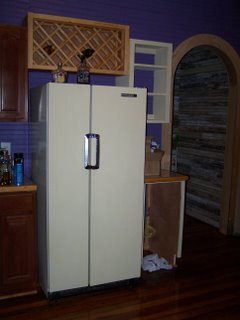 I looked for some good before pictures, but they are all fuzzy. They don't really show the grime or age of the Kelvinator. I shit you not, this is the actual name on the fridge. Of course I can't call it by name without doing my best Hans & Franz impersonation (Ja, ve painted die Kalvinator!). It almost looks new with a few dozen coats of milk paint.
posted by John | 7:55 PM
![]()
![]()
6 Comments:
The milk paint looks great. Maybe I'll try that technique on our old ikea entertainment center to try to give it a new lease on life. Unless Aaron talks me into a new plasma... we'll see.
I love the Kelvinator! That rocks. Do you have to set the temperature in Kelvin on the inside???
My husband used to live in a rented house with an ancient gas dryer called Revichron. Revichron periodically flamed socks, but he has fond memories of the house shaking racket that Revichron used to make.
Hey, just wanted to tell you both the kitchen is looking great!!! I really like the paint job on the cabinets.
I've always wondered about that milk paint; interesting that it took so many coats. Glad I didn't have to find that out myself the hard way!
We spray painted our frigde about 1.5 years ago and it still looks awesome (in comparison to it's original state) so I bet the paint will hold up for quite a while. I don't blame your wife for giving in to temptation, sometimes you gotta make those small improvements just to keep your sanity :)
I really like the colors you've chosen for your kitchen.
The milk paint looks marvelous. Interesting that it takes so many applications, but I'm sure that's part of the charm.
Wow, I was thinking of using milk paint to paint the drawers and shelves in my new closet, but now I'm not so sure.
I used to live in a house with a kelvinator; the same house had a garbage disposer called "insinkerator" Wouldn't you love to be on the focus group that came up with those?
takoma-bark.com
I know it sounds like an ordeal, but I think it has more to do with us than the paint. It has its own set of rules, so we're still learning. I suspect that once I perfect my mixing technique that it'll go a lot quicker (fewer coats).
We're still planning to paint our living built-ins (14 ft wide, 18 inches deep, and 10 feet tall) with milk paint. I'm hoping we get the hang of it before we're finished.
I really like the milk paint. Its finish has a texture and feel that I haven't seen duplicated with any other type of paint. Even if it takes longer, I think it is worth it.
Post a Comment
<< Home